8N Tractors: A Piece of Agricultural History
The Ford 8N tractor, a true icon of American agriculture, holds a special place in the hearts of collectors and restoration enthusiasts. Its simple yet robust design, coupled with its enduring reliability, cemented its legacy as a workhorse of its era. Restoring an 8N is more than just a mechanical project; it’s a journey through agricultural history, a testament to enduring craftsmanship, and a rewarding challenge for anyone passionate about vintage machinery. This comprehensive guide will lead you through each step, ensuring a successful and satisfying restoration. Did you know that over half a million 8N tractors were produced, solidifying its place as a pivotal machine in American farming history? For additional resources, check out this helpful 8N generator.
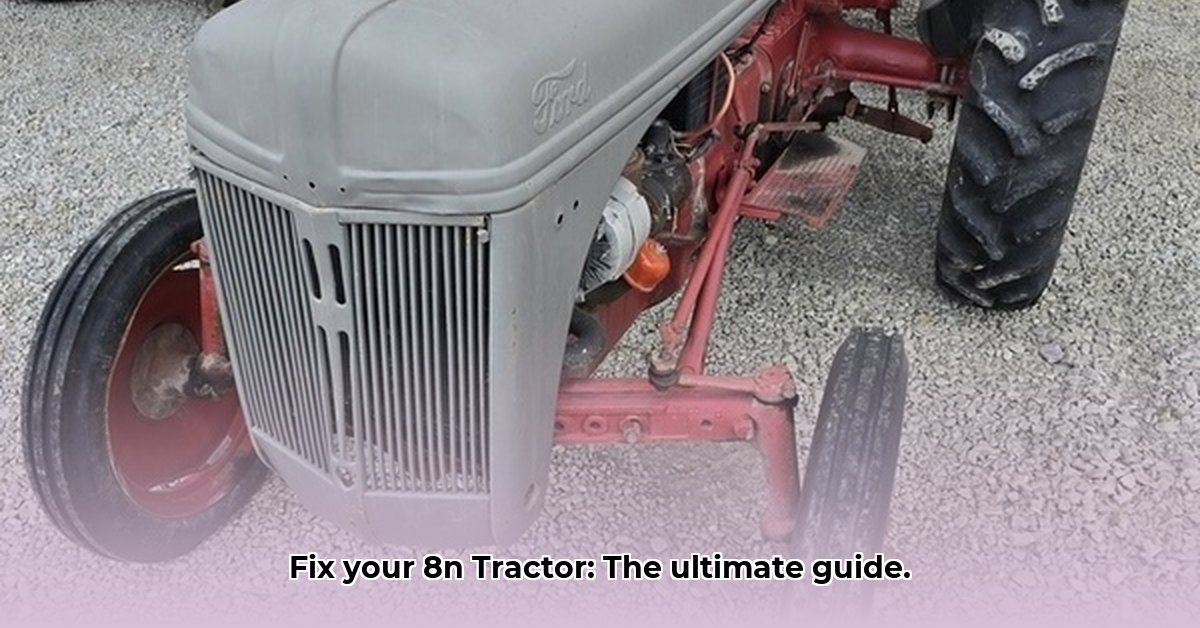
Assessing Your 8N: A Visual Inspection
Before you begin the restoration process, a thorough visual inspection is paramount. This crucial first step lays the groundwork for a successful project. This assessment will determine the state of your tractor and help you plan the necessary steps and resources.
- Take Detailed Photos: Document everything—engine, transmission, hydraulics, and body—with numerous high-resolution photographs.
- Inventory Missing Parts: Create a list of any missing parts, noting their specifics (e.g., part number if known).
- Assess Component Condition: Evaluate the condition of each component—engine block, transmission gears, hydraulic cylinders, and body panels—noting any damage, wear, or rust. This initial assessment is essential for planning your parts sourcing strategy and repair techniques.
Parts Sourcing and Identification: Navigating the Marketplace
Locating the necessary parts for your 8N restoration can be a significant undertaking. The availability of original parts (NOS) is extremely limited, and their cost can be prohibitive. The quality of reproduction parts can also vary widely.
- Original Parts (NOS): These ensure authenticity and superior quality but are scarce and expensive.
- Reproduction Parts: More readily available and generally less costly than NOS parts; however, quality needs careful consideration to ensure proper fit and function.
- Online Communities & Forums: Engaging with online forums and communities dedicated to Ford 8N tractors offers a valuable resource for sourcing parts, networking with other enthusiasts, and receiving expert advice. "Finding a specific part can be a challenge," explains John Miller, a restoration expert and member of the Ford 8N Tractor Club of America. "But connecting with others often leads to success."
Disassembly and Cleaning: A Methodical Approach
Disassembly should be performed systematically, with each step meticulously documented through photography and detailed notes. Remember safety first! Wear appropriate protective gear, and work in a well-ventilated area.
Step-by-Step Guide:
- Safety Precautions: Always wear safety glasses, gloves, and protective clothing.
- Detailed Photography: Photograph each step of the disassembly process, labeling wires and components where necessary.
- Component Removal: Carefully remove each component, using the correct tools to avoid damage.
- Thorough Cleaning: Use appropriate degreasers and brushes to thoroughly clean each component, removing grease, grime, and rust.
Repair and Restoration Techniques: Repairing vs. Replacing
Deciding whether to repair or replace a part requires careful consideration of several factors: the component's condition, cost, and your own skill level.
- Welding: Ideal for repairing cracks and broken metal parts. Professional welding services may be necessary for complex repairs.
- Machining: Used to restore worn surfaces to their original dimensions. Special tools and skills are often required. "Precise machining is critical for restoring worn parts," notes Sarah Chen, a mechanical engineer specializing in vintage machinery restoration. "Improper machining can compromise the functionality of the restored components."
- Fabrication: Creating missing components requires substantial fabrication skills and tools. Outsourcing to a skilled fabricator is often the most practical option.
Reassembly and Testing: A Gradual Process
Reassembly is largely the reverse of disassembly, calling for the same level of precision and care. Using torque wrenches to tighten bolts to the correct specifications is essential for proper functionality and long-term reliability.
Testing Procedures:
- Engine Start-Up: Verify proper engine starting, idling, and operation under various conditions.
- Transmission Operation: Ensure smooth gear shifting and correct gear ratios.
- Hydraulic System Check: Test the lift arms to verify proper functionality.
- Overall Functionality: Test all systems thoroughly to ensure smooth and reliable operation.
Resources and Community: Utilizing Collective Knowledge
Connecting with other 8N enthusiasts provides invaluable support, advice, and access to hard-to-find parts. Online forums and local clubs are rich sources of information and experience.
- Online Forums: Websites and forums dedicated to Ford 8N tractors offer a wealth of knowledge, troubleshooting tips, and a community of experienced restorers.
- Local Clubs/Organizations: Joining local clubs and organizations will provide networking opportunities and access to restoration experts and potentially rare parts.
Maintenance and Preservation: Protecting Your Investment
Once restored, proper maintenance is crucial to preserving your 8N’s value and functionality. Regular cleaning, lubrication, and proper storage in a dry environment are all key elements of long-term preservation. Did you know that regular lubrication of moving parts can extend the lifespan of an 8N significantly? Don’t underestimate this aspect of ownership.
Weighing Your Restored 8N: A Critical Step
Accurately determining your Ford 8N's weight post-restoration is essential for safe transport, insurance purposes, and general understanding of your machine's characteristics. This requires accessing a heavy-duty scale (capable of weighing several tons) and carefully documenting the process. Remember to include the weight of fluids, attachments, and any additional restoration components in your final calculation. This data is not only valuable for logistics but also provides insight into the overall success of your restoration project.